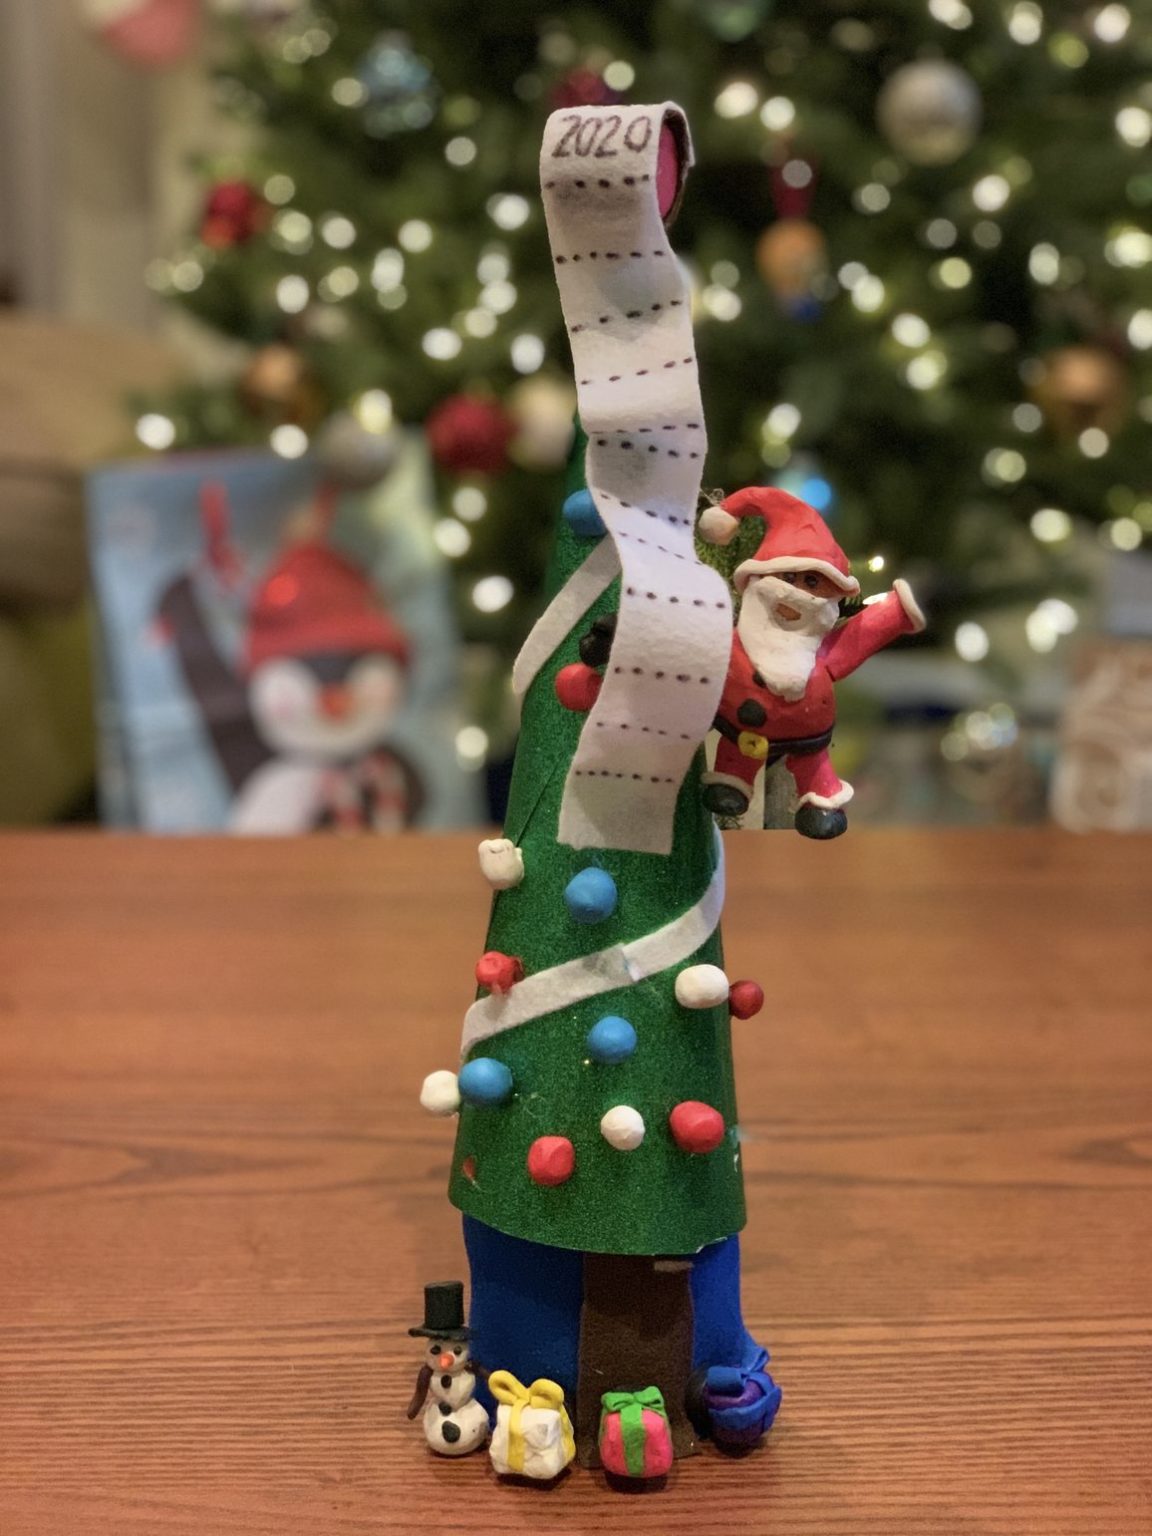
Who Says Only a Star Can be a Tree Topper?
Although we can agree that toilet paper has saved us countless times, it isn’t what you think this is about this time!
Such a witty label for a can craft, don’t you think?
Kitchen Mama thinks so, too!
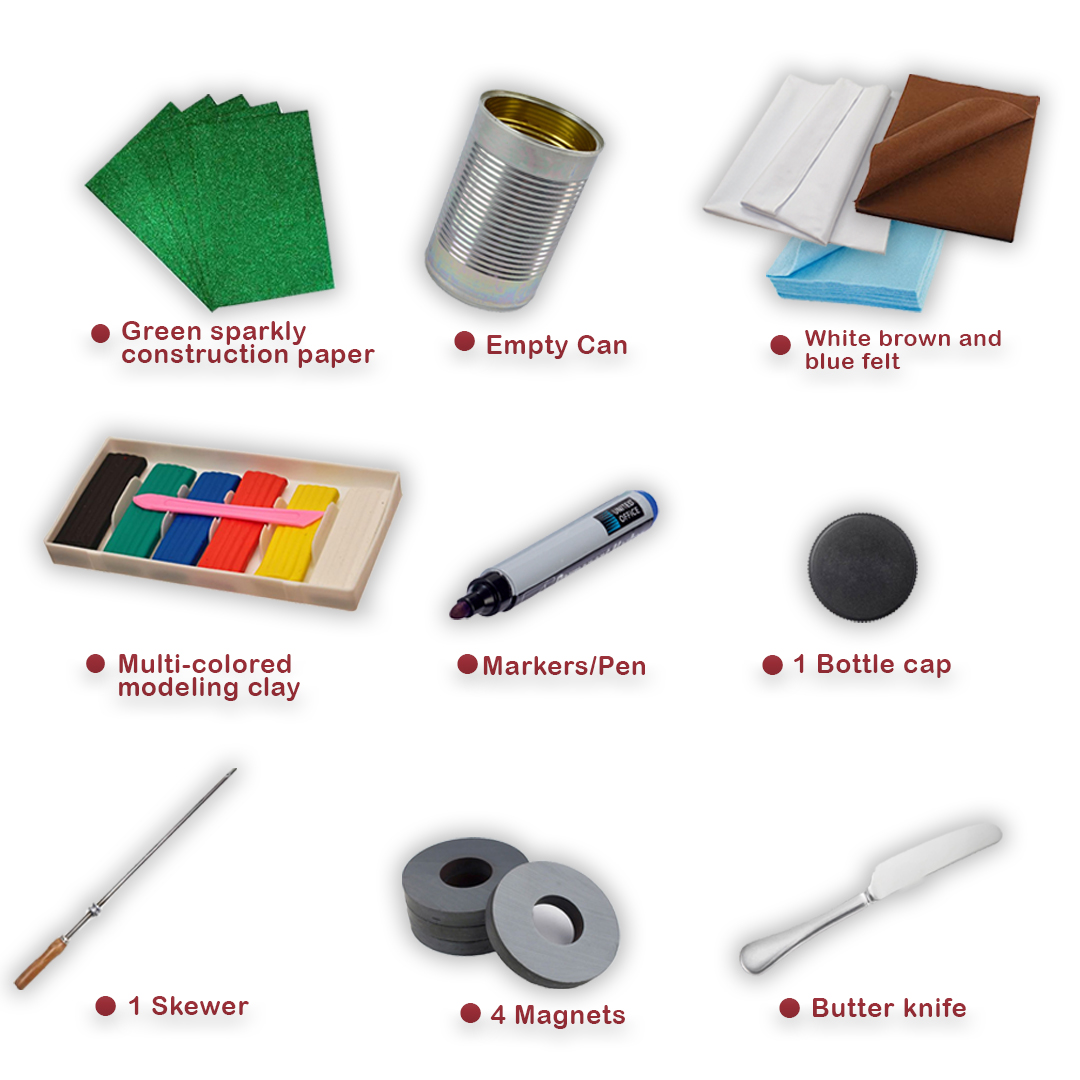
Things you’ll need:
-Green sparkly construction paper
-An empty can
-White, brown, and blue felt
-Multi-colored modeling clay
-Markers/pen
-1 bottle cap
-1 skewer
-4 magnets
-butter knife
🥫Can
MATERIALS: brown and dark blue felt, marker/pen, hot glue gun
- Measure the height of the can.
- Cut out enough blue felt to cover the can.
- Wrap the blue felt around it tightly.
- Use the hot glue gun to glue down the felt.
🎄Christmas Tree
MATERIALS: green glittery paper, white felt, hot glue gun
- Wrap the green sparkly paper into a cone shape.
- Cut off excess from the bottom.
- Glue the edges down to keep the cone shape.
- Cut a thin strip of white felt and wrap it around the tree.
Clay Ornaments
MATERIALS: red, white, and blue clay, hot glue gun
- Cut the clay into ½ inch pieces.
- Use the clay and roll them into tiny balls.
- Hot glue the clay balls (ornaments) to the tree. Remember to not put a lot of hot glue as it can easily melt the clay.
🧻Toilet Paper Tree Topper
MATERIALS: White felt, small-cap, a black marker, hot glue gun
- Use a ruler to measure the width of your cap.
- Cut a strip of white felt that is the width of your cap and 12 inches in length.
- Use a black marker/sharpie to draw dotted lines. This represents the toilet paper squares.
- Glue your toilet paper tree topper to the top of your tree. You might need to add a stick in the back to support your tree topper.
- Let the felt hang down the tree.
🎅🏼Santa
MATERIALS: Red, black, peach, white, and yellow clay, butter knife, skewer
- Body: Make a big ball of red clay as this will be Santa’s belly
- Arms and legs: Roll 4 small cylinders the size and thickness of a baby carrot
- Head: Roll a peach-colored clay into a small ball as this will be Santa’s head.
- Assemble the parts together.
- Trim: Roll a 6-inch piece of white clay (thickness of a piece of spaghetti). Use this to decorate Santa’s cuffs, pants, and the brim of his hat.
- Belt: Roll a 3-inch piece of black clay (thickness of a piece of spaghetti)
- Belt buckle: Attach a small piece of yellow clay to the black belt and squish the belt to Santa’s big belly.
- Buttons: Roll out 2 small black balls as these are Santa’s buttons
- Mitts and shoes: Cut out 4 small pieces of black clay and form them into Santa’s mittens and shoes.
- Santa’s beard: Flatten a small piece of white clay. Cut a triangle and make the edges as bumpy as possible. Cut out a small rectangle for the mouth. Place it on Santa’s face.
- Eyes: Add eyes by rolling out very tiny pieces of black clay.
- Santa’s hat: Create a cone using the red clay and make it look like a droopy mountain. Roll up a small piece of white clay and place it on the tip of his hat. Make a little hole in the bottom of the hat and place it on Santa’s bald head.
🎁Magnetic Clay Presents
MATERIALS: different color clay, 4 magnets
- Choose a bright-colored clay and shape it into a small cube.
- Cut out a small piece of clay and flatten it like a pancake. Then cut out small strips to use as ribbons on the sides and top of the presents.
- Glue the magnet on the backside c of the presents.